

Hello guys, in this quick tutorial, am going to show you an easy way to create double exposure images.
NB: This tutorial was done with Windows, if you’re on a MAC, Ctrl mean CMD and Alt is Option
This tutorial was carried out in Photoshop CC 2017 but it can also be achieved using lower version as what was used mainly in the tutorial is blend mode with older versions of Photoshop has.
If you’ve been using Photoshop for some time now, you must know a thing or two about Blend Modes. From my own experience, I can say that blend mode is a way for object on one layer (or a layer) to interact with the colours and pixels on another layer beneath it.
In this case, we’re simply going to use the Lighten Blend mode to achieve this easy double exposure effect.
Here is how the original image looks like

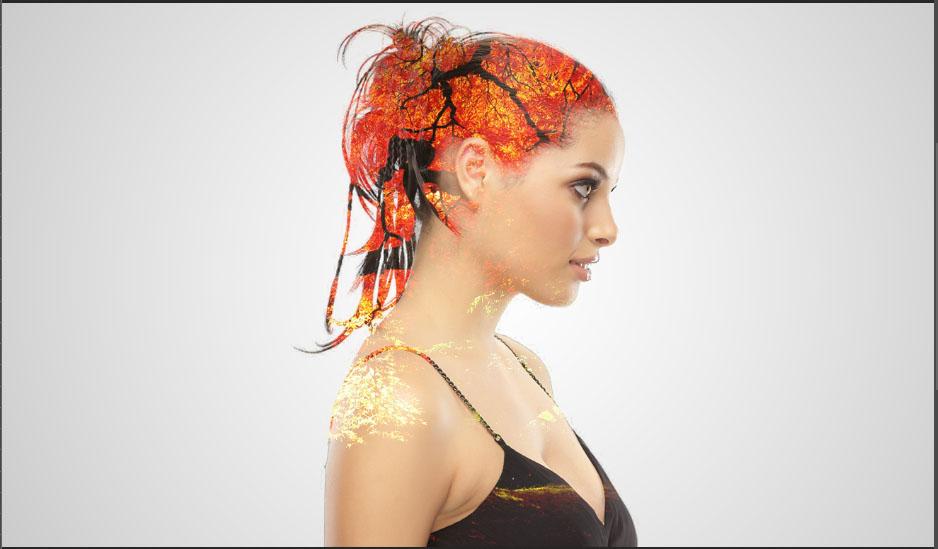
Here is the image after the Double Exposure Effect.
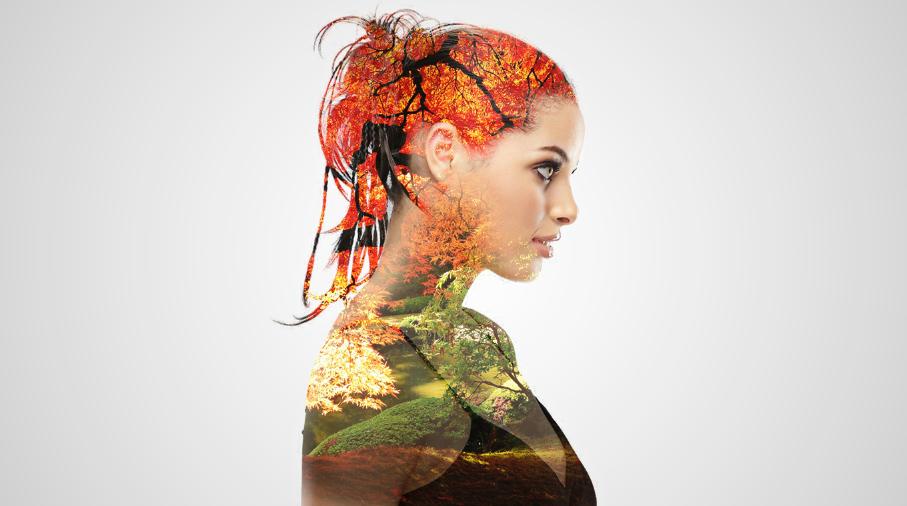
Cool Right?
Let’s get started.
First, open the image you desire to use in Photoshop and then make a selection of the image only using any of your best selection tool.
Next, open a new workspace using the keyboard shortcut Ctrl + N.
In my own case, I used 1366 by 768px but of course you can choose any size of your choice
Below the layer (the model layer), create a background using the gradient option from fill or adjustment layer.
Choose the black and white gradient and then change
Style: Radial
Angle: 90
Scale: 802
Check the Reverse Checkbox

Click Ok.
This is how the image looks on the new background.
Next, import the new background needed for the double exposure effect.
NB: The background should be above the image.
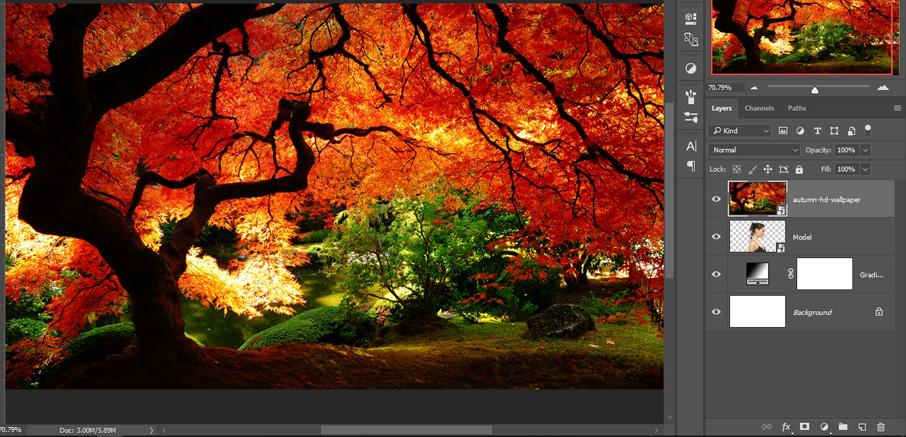
From the screen shot above, notice the layer, the Gradient made, the model layer and the background layer.
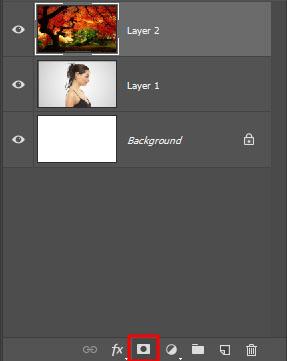
Still on the background just imported, hold down the control key and click on the model layer. You should notice something like a match ant around the background.
After this, add a layer mask on the background. This can be done on the layer panel by clicking on the add mask icon. See screenshot below
What this is actually does is to make a mask around the background with the selection made. If done correctly, your image should now look like this.

Look closely at the thumbnail in the layer panel and notice how the mask looks.
It’s kind of black and White. The black area shows the part of the image that is hidden while the white area shows the part of the image that is visible.
Now the image looks cool but there’s still a couple of steps left. Notice the face of the model is covered and we want to revel it.
Using, the brush tool, we’re going to change the foreground to black since we want to reveal the face (and we’re going to do this by hiding the area of the background that covered the face. And as I’ve already explained earlier that black is for the hidden part) So to make the face visible, we’re going to change the foreground to black and hide the area of the background covering the face.
After this, your image should look like this.

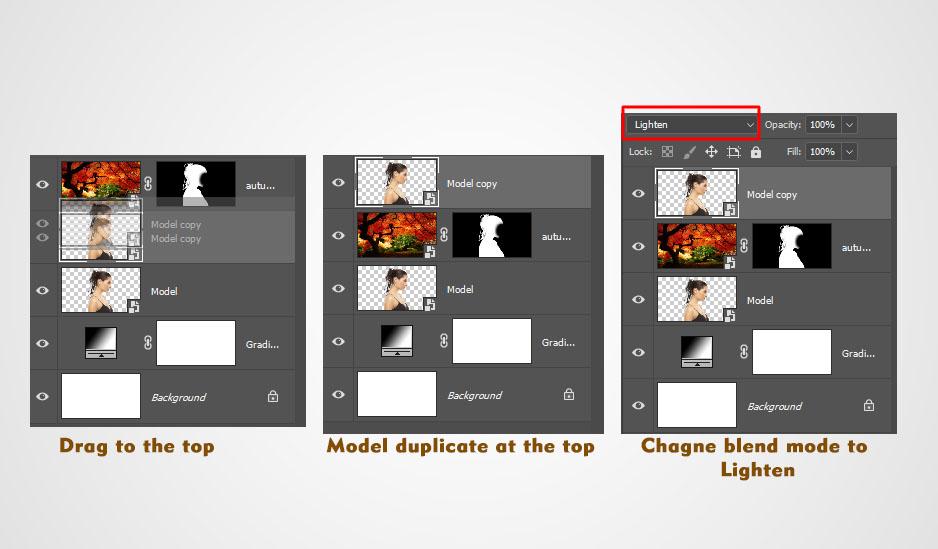
Next, duplicate the model layer and place it above all the layers.
You can do this by pressing the shortcut key Ctrl + Shift + ] or you can simply click and drag the duplicated model layer to the top and change blending mode to Lighten.
See screenshot below:
After this, the image should look like this.
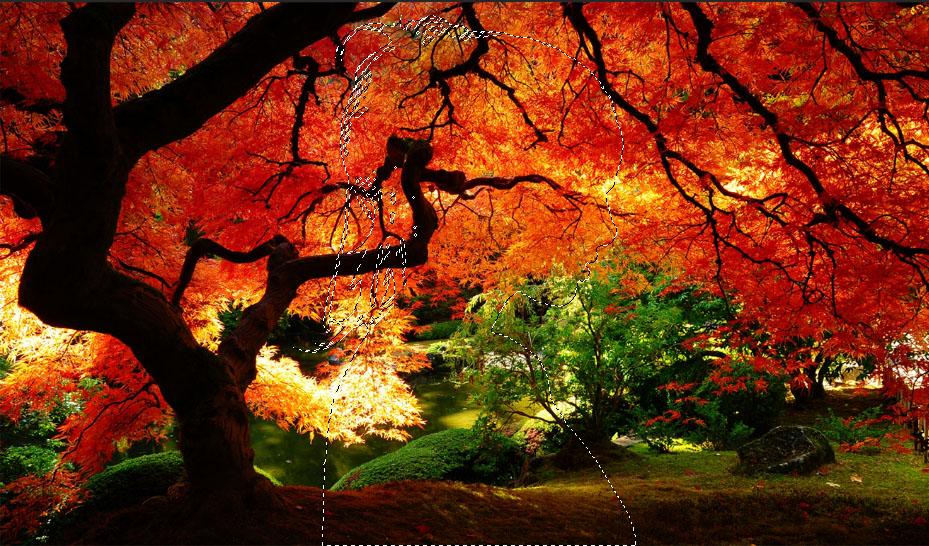
On the layer copy, add a layer mask and use the brush tool and hide parts of the like I did in the image below.
Remember, to hide parts of the image, your brush foreground should be changed to black.
After this, double click on the layer mask to open up the properties panel.
Reduce the density to suit your need. See screenshot below
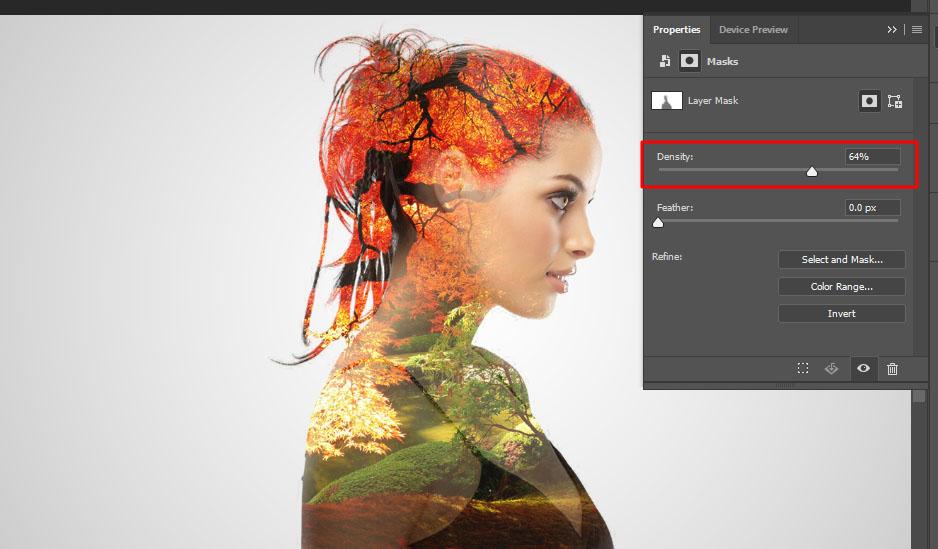
In this case, the density was reduced to 64% which is cool.
After this, wrap up by adding a little contract to the image, you can do this with many methods but the gradient map was used in this case.
From the Fill and Adjustment layer, choose the black and white gradient map and change the blending mode to soft light and reduce opacity to about 30%.
Here’s our final effect.
Please see video tutorial for demonstration.
Worth sharing huh? Sharing is loving, please share
If you liked this article, then please subscribe to our YouTube Channel for video tutorials. You can also find us on Twitter, Instagram and Facebook.
You might also like
Rainbow Eye Spectrum effect in Photoshop


Post A Comment:
0 comments: